|
Run Radiant and open the map. Default
grid scale 4 is ok. Draw a
brush as shown.
Click Curve\Cylinder - the brush becomes
a patch. Get a side view and stretch
the cylinder upwards to make it into some
sort of chimney-type pipe.
Click on the metal_c07a texture to
texture the cylinder. The texture will
probably look all stretched and
horrid. Press shift+S and click
natural and done.

Note that only the outer surface of the
cylinder is textured, the inner is
effectively nodraw.
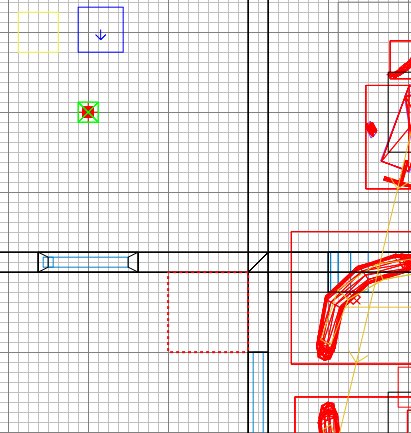
Let's warp the pipe. Press V and
get a side 2D view. Filter the models
(shift+M) to make the view clearer.
Zoom in. Note that the middle height
points may not fall on a grid
intersection. If not, drop down the
grid scale until they do.

In my example, grid 3 will
do. Warp the tube in interesting ways
by grabbing the illuminated vertices and
dragging them, one at a time. The
cylinder will warp as you drag the vertex
point. In my example, I've dragged the
top vertices to the left somewhat, and I've
dragged the middle ones up, and outward to
give a leaning, bulging cylinder.

Experiment, using different 2D views, to
see what sort of weird shapes it is possible
to create. You can also drag edges in
3D view, but this is trickier. Press V
or ESC to cancel vertex mode when you've
experimented enough, but leave the brush
selected.
If you want to cap the open ends, and
create a solid-looking cylinder, click
Curve\cap selection. The top and
bottom are neatly capped, and the three
brushes are grouped for you
automatically. We don't really want
the bottom cap, so a quick way of getting
rid of it is to change to grid scale 9, lift
the group one notch so you can see under it
in 3D, deselect the group and then select
the bottom brush alone and delete
(Backspace) it.
Then select the group (now only 2
brushes) with shift+alt+click and put it
back down one notch.
If you want to see how your weird
cylinder came out, save compile and test.

You can of course rotate these patches
just like any other brush. But if you
scale them, watch out! Scaling
downward may result in some of the critical
control vertices not aligning to exact grid
co-ordinates, eg instead of a co-ord being
(24, 56, 44) you might get (24.043, 56.324,
44.985), which tends to make things
crash. :(
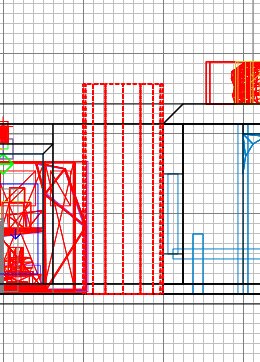
So if you have to scale a cylinder
(as I did when I wanted to make my V-1
creation of multiple cylinders about 75% of
its created size), you will need to examine
all the component vertices in close up, with
a grid scale of probably 1, and drag to
intersections any vertices that fall in the
gaps between them.
|


